
The moment a vacuum starts making that sad grinding sound or it just stops mid-living-room, my old serial spender brain still whispers, Just replace it. But a lot of vacuum problems are either simple and cheap to fix, or expensive and risky to DIY. The trick is sorting those categories fast, then doing a quick, numbers-based comparison so you do not spend $300 to avoid a $20 problem.
This is my frugal, safety-first way to decide whether to repair or replace a broken vacuum, without shame, guesswork, or YouTube rabbit holes.
Step 1: Name the problem
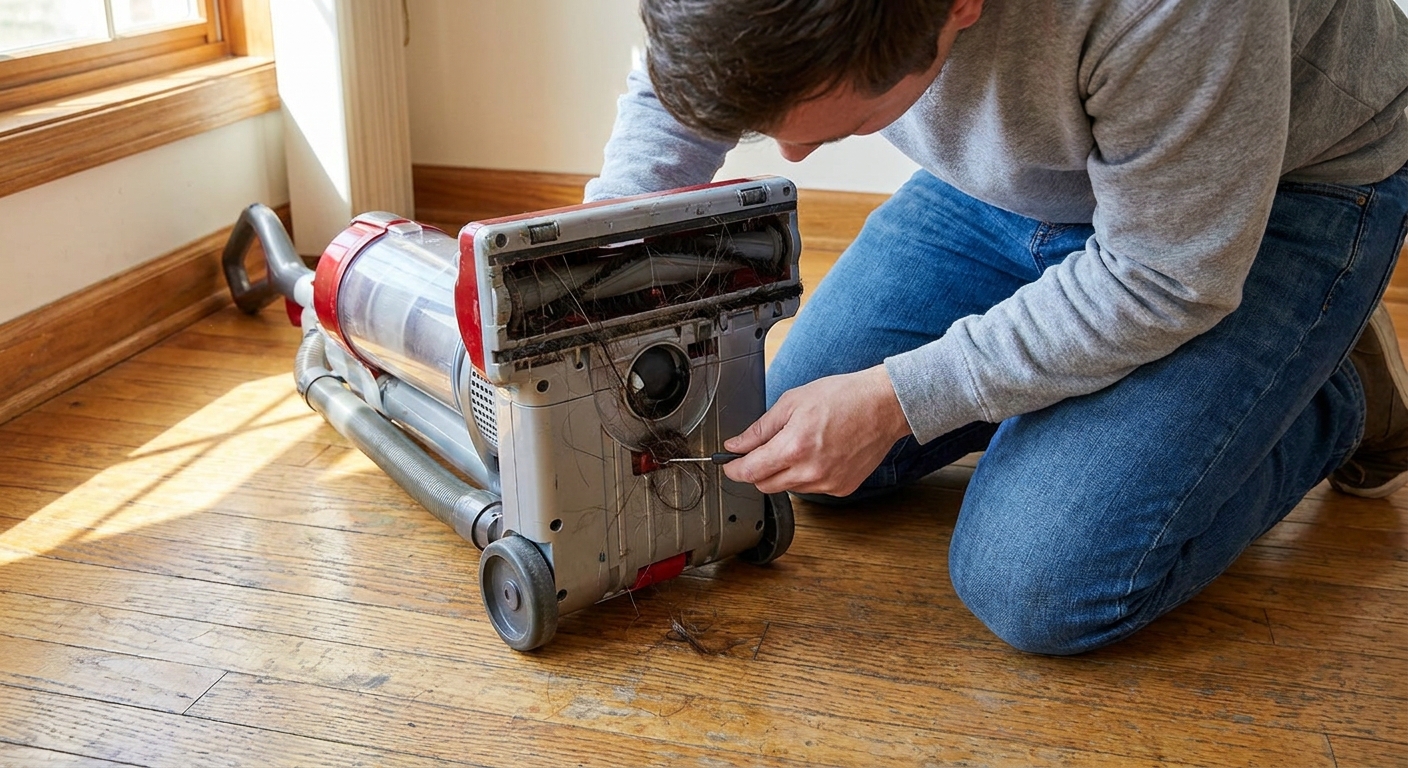
Start with one question: Is this an airflow problem (suction, clog, brush roll), or is it an electrical or motor problem?
Real life note: there is overlap. A vacuum that shuts off can be an electrical failure, but it is also often a thermal cutoff reacting to low airflow from a clog or filthy filter. So think in categories, not absolutes.
Often repairable (and frequently DIY)
- Loss of suction (full bin, clogged hose, dirty filters)
- Brush roll not spinning (broken belt, jammed brush, height set wrong)
- Bad smell (dirty filter, clogged line, pet hair stuck in brush roll)
- Noisy but still running (debris in head, loose roller, clogged airway)
- Poor pickup on carpet (belt slipping, brush roll worn, airflow blockage)
High-risk or usually not DIY
- Burning smell, smoke, or heat coming from the unit
- Sparks, crackling sounds, or visible arcing
- Power issues (won’t turn on, cuts out when cord moves)
- Water exposure (vacuumed up liquid with a non-wet/dry model)
There is also a middle category that is sometimes doable, sometimes not: things like switch replacement, cord replacement, battery replacement, and certain internal clean-outs. If you are not comfortable, treat those as “quote it” work.
Step 2: Do the quick checks
Unplug the vacuum first. Always. Then work through these in order because they go from free to cheap.
0) Find the exact model number
Before you buy parts, confirm your exact model number (usually on a sticker on the bottom plate, behind the bin, or near the battery on cordless models). Filters and belts are annoyingly model-specific.
1) Empty and inspect the bin or bag
- Empty the canister or replace the bag.
- Check the seals and the bin seating. If the bin is not clicked in properly, many vacuums lose suction instantly.
2) Check the filters (the silent budget killer)
Most vacuums have at least one filter, often two. A clogged filter can mimic a dying motor.
- If you have a washable filter, rinse it and let it dry completely (often 24 hours) before reinstalling.
- If it is a replaceable HEPA-style filter, check the manual and the model number to price a replacement.
Frugal reality: a filter that is often $10 to $30 (sometimes more depending on brand and model) can make an “old vacuum” feel brand new.
3) Clear blockages in the hose and airway
- Detach the hose and visually inspect both ends.
- If you cannot see through it, you likely have a clog.
- Use a broom handle or a flexible drain snake gently, not anything sharp that can puncture the hose.
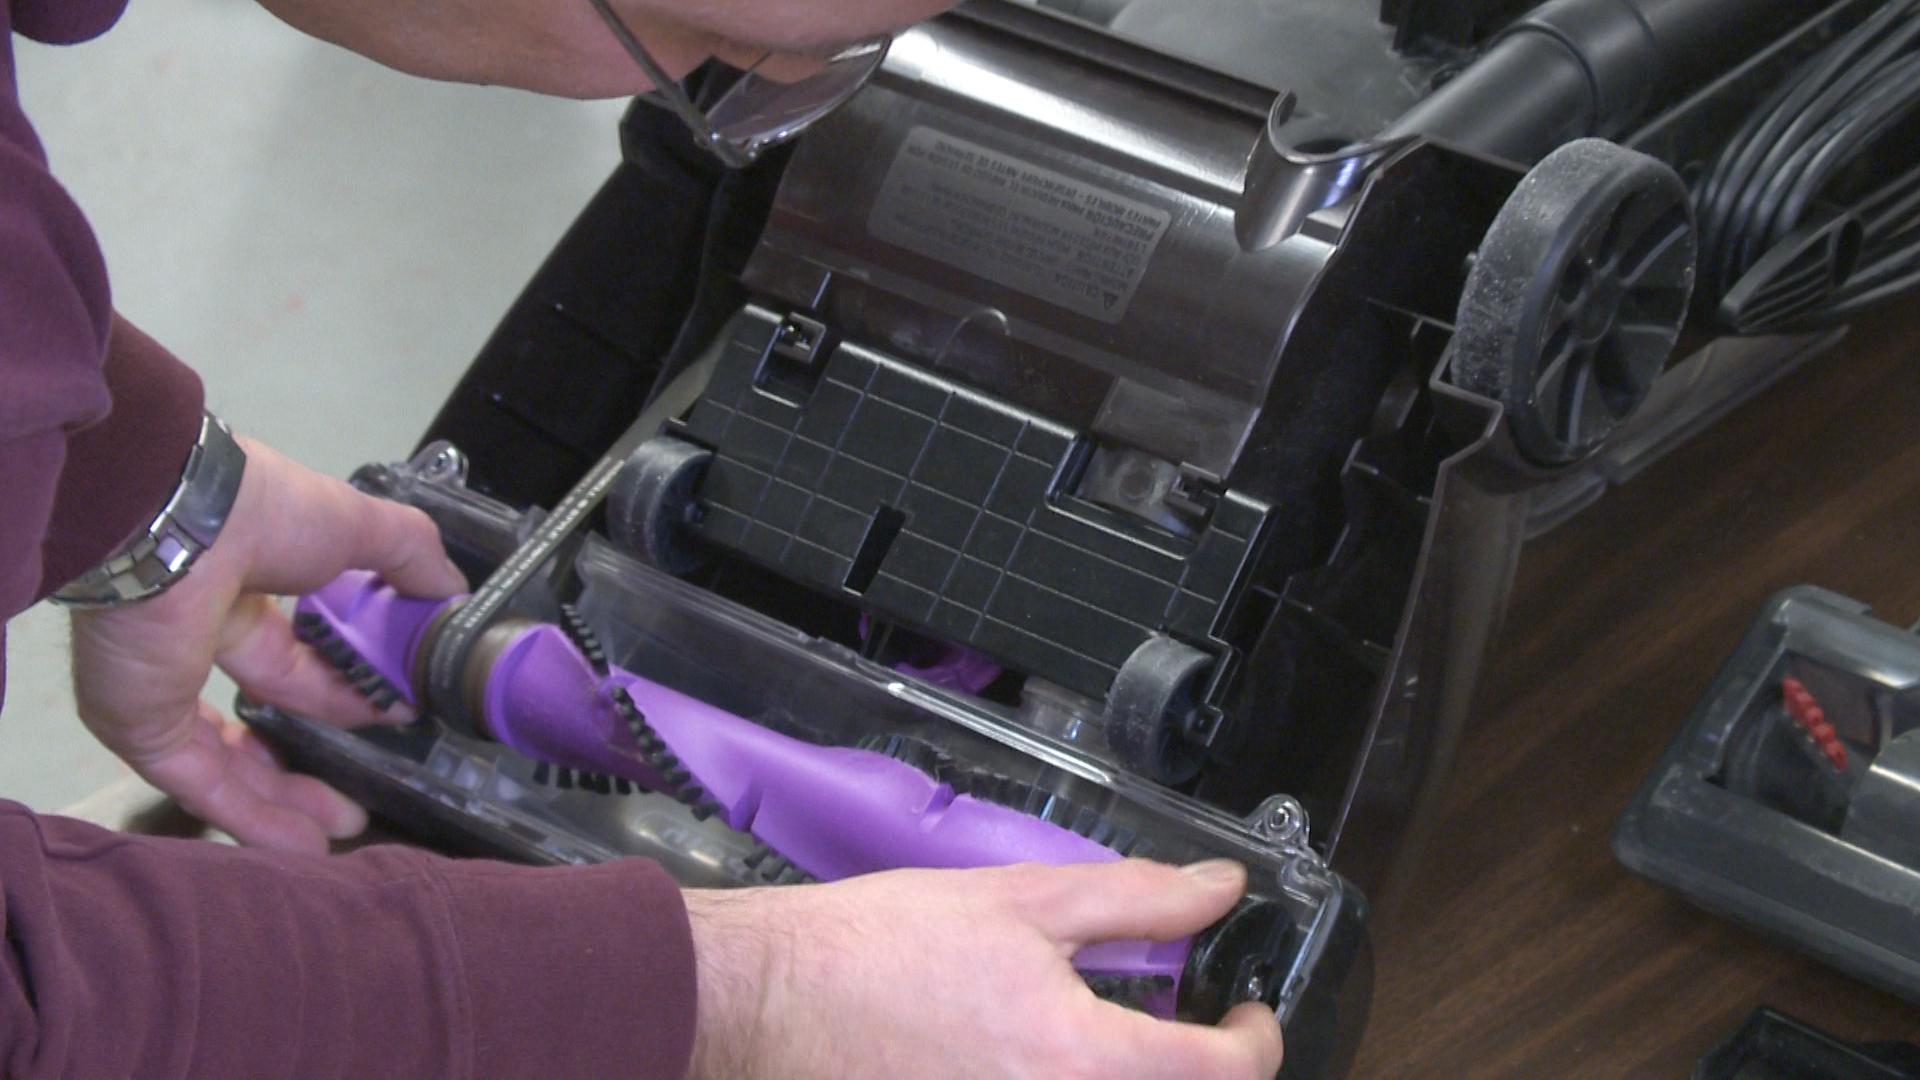
4) Inspect the brush roll and belt
If the brush roll is jammed with hair, the belt can slip or snap.
- Cut away hair and string (scissors and patience work wonders).
- Check if the belt is cracked, loose, or broken. Belts are usually inexpensive and very user-serviceable on many models.
Hard stop: when to stop
I am all for DIY, but these are my non-negotiable stop points. If any of these are true, unplug the vacuum and do not run it again until a qualified tech evaluates it.
- Burning smell (especially plastic or electrical smell)
- Smoke or the housing feels abnormally hot
- Sparks at the plug, cord, switch, or inside the unit
- Frayed, cracked, or warm-to-the-touch cord
- It trips the breaker or frequently blows a fuse
- It was used on water (unless it is a wet/dry vacuum designed for that)
- You see liquid in the canister area or anywhere near the motor housing
At that point, your decision becomes simple: professional repair quote or replace. No more “maybe it will be fine.”
Step 3: Check the warranty
This step can feel annoying, but it can save you real money. Search your vacuum’s model number plus “warranty,” or check your receipt email if you bought it online.
- Manufacturer warranty: Typically 1 to 5 years, but check your brand and model. Some cover the motor longer than other parts.
- Credit card benefits: Some cards extend the manufacturer warranty or provide purchase protection.
- Retailer protection plans: If you have one, now is the time to use it.
If the repair is covered, your “repair vs replace” math changes instantly. You might be paying $0, or just shipping.
Step 4: Get a repair quote
If your vacuum is still not working after the basic checks, get a quote. Many local vacuum shops will diagnose for a flat fee that may be applied toward the repair.
When you get a quote, ask for:
- Parts cost (motor, switch, cord reel, circuit board, brush roll, etc.)
- Labor cost
- Diagnostic fee (and whether it is waived if you proceed)
- Turnaround time
- Repair warranty (even 30 to 90 days helps)
Frugal tip: If you are already paying a diagnostic fee, ask if they can also check airflow and seals. A “motor replacement” is painful if the real issue is a cracked hose or a bad gasket.
Step 5: Compare repair vs replacement
The simplest rule of thumb you will hear is “if the repair is more than half the price of a new vacuum, replace it.” That is not terrible, but we can do better with one extra step: compare cost per year of service.
What to include in your comparison
- Total repair cost (parts + labor + diagnostic fee you will actually pay)
- Expected remaining life after repair (estimate honestly based on age and condition)
- Replacement cost for a comparable vacuum (not necessarily the fanciest one)
- Expected life of the replacement (based on reviews, warranty length, and your usage)
- Ongoing consumables (bags, filters, belts). These can add up and should influence what you buy next.
Worked example: Repair vs replace
Let’s say you have a 6-year-old midrange upright vacuum that originally cost $250.
- Problem: It runs, but suction is weak and it gets warm. No smoke, no sparks, no burning-plastic smell. If you smell anything sharp or electrical, treat that as a hard stop and get it evaluated.
- DIY checks: Filters replaced ($25). Hose cleared. Belt replaced ($12). Still weak suction.
- Repair shop quote: $35 diagnostic fee (applied), $110 labor, $70 part. Total: $180.
- Comparable replacement: A new upright with similar performance and warranty: $220.
Now the frugal math:
- Repair cost per year: $180 ÷ 2 more years (a reasonable guess for a 6-year-old unit after a major repair) = $90/year.
- Replace cost per year: $220 ÷ 6 years (a reasonable planning assumption for many midrange vacuums with decent care, but brand and type matter) = $36.67/year.
Even though replacing “feels” more expensive in the moment, the cost-per-year says the replacement is the cheaper choice. In this example, I would replace, and I would not feel guilty about it.
Now flip the numbers:
- Repair quote: $60 total to replace a switch and clear an internal clog
- Expected added life: 3 years
$60 ÷ 3 = $20/year. That is a repair all day.
How age and type matter
If your vacuum is under 3 years old
- Check warranty first.
- Repairs are more likely to be worth it because the rest of the machine is still young.
If it is 4 to 7 years old
- This is the gray zone.
- Small repairs (belts, brush roll, hose, seals, filters) are usually worth it.
- Major electrical repairs are often not, unless it is a higher-end model with strong parts availability.
If it is 8+ years old
- If it needs a motor or control board, replacement often wins on cost-per-year.
- If it only needs consumables and a deep clean, keep it going.
Also consider the style:
- Bagged uprights: Often easier to keep clean internally and can be long-lasting, but bags are an ongoing cost.
- Bagless canisters: Filters matter a lot. A neglected filter can mimic a bigger failure.
- Cordless stick vacuums: Batteries are the swing factor. If the battery is expensive and not easily replaceable, replacement may be the practical choice.
- Robot vacuums: Brush modules and wheels can be repairable, but sensors and main boards get pricey fast.
Cordless: battery or blockage?
Cordless stick vacuums love to look dead when they are actually just choked with dust. Before you assume the battery is toast, run this quick triage:
- Clean every filter you can access (pre-filter, foam filter, post-filter). Many sticks lose suction dramatically with even slightly clogged filters.
- Check for clogs in the wand, floor head, and dust inlet.
- Rule out the charger if possible. If it will not charge at all, test a known-good outlet and inspect the charging contacts.
- Be honest about battery age: If it is several years old and runtime has been fading for months, a replacement battery might be the whole story. Price the battery first, because it can be most of the cost of a new unit.
Consumables vs real failures
This is my mental checklist for separating “maintenance” from “uh-oh.”
Usually cheap and user-serviceable
- Filters
- Bags
- Belts
- Brush roll cleaning or replacement
- Hose clogs
- Gaskets and seals (sometimes)
- Full bin or jammed cyclone assembly
Often pro repair or replacement territory
- Motor failure
- Burnt wiring
- Circuit board issues
- Cord reel replacement (sometimes doable, but not worth the risk for most people)
- Battery system failure in cordless units when batteries are proprietary and expensive
If you replace it, buy smarter
Replacing is not a failure. It is just a decision. If you are buying a new vacuum, here are a few frugal filters to run it through so you are not back here again in two years.
- Check parts availability: Can you easily buy filters, belts, and brush rolls for this model?
- Look at warranty length: A longer warranty can signal better build quality, and it protects your budget.
- Price the consumables: Bags and filters are part of the real cost.
- Be honest about your home: Pets, long hair, lots of carpet, or kids mean you need something that can handle the workload.
- Performance needs still matter: If allergies are a factor, prioritize sealed filtration and true HEPA options, not just raw suction.
- Consider used or refurbished: A reputable refurbished unit with a short warranty can be a sweet spot if your budget is tight.
- Bonus: If you can get a solid repair that buys you a few more years, that is also less e-waste. Not the main goal, but a nice win.
Quick decision guide
- Repair it if the fix is a clog, filter, belt, brush roll, hose, or a minor part, and the total cost is low relative to the added life you expect.
- Replace it if the repair involves major electrical issues, the vacuum is older, and your cost-per-year is higher than a reasonable replacement.
- Stop immediately if there is burning smell, smoke, sparks, cord damage, breaker trips, or water exposure. That is not a keep-testing situation.
If you want a simple personal rule: once I see an electrical red flag, I move into quote-or-replace mode. Once I see a big repair quote on an older machine, I do the cost-per-year math and let the numbers make the decision for me.
FAQ
Is it worth repairing a vacuum motor?
Sometimes, but usually only if the vacuum is higher-end, parts are available, and the repair comes with a solid warranty. For many midrange vacuums, a motor repair quote can get close to replacement cost. If the motor issue comes with burning smell, overheating, smoke, or sparking, prioritize safety and get a professional evaluation.
Why does my vacuum run but not pick up?
The most common causes are a clog, dirty filters, a full bin or bag, a broken belt, or a jammed brush roll. Those are all good DIY checks to do before paying for service.
What if the vacuum keeps shutting off?
Many vacuums shut off when they overheat, often due to restricted airflow from clogs or dirty filters. Unplug it, let it cool, and check airflow and filters first. Some models also have reset buttons or thermal cutoffs, so a quick glance at the manual can help. If it continues, or if you smell anything burning, stop and get a repair quote.
Can I replace a vacuum cord myself?
Because cord and switch work can involve electrical risk, I treat cord issues as a stop point. If the cord is frayed, cracked, warm, or the vacuum cuts out when you move it, unplug it and have a professional handle it. Saving money is never worth an electrical hazard.