I used to treat clothes like they were disposable. When my jeans wore thin at the inner thighs or a sweater snagged, I would sigh, toss it in the “maybe later” pile, and eventually replace it. When I started digging out of debt, I realized something: replacing “small” things adds up fast. Learning to repair instead of replace was one of the quiet habits that made my budget breathe again.
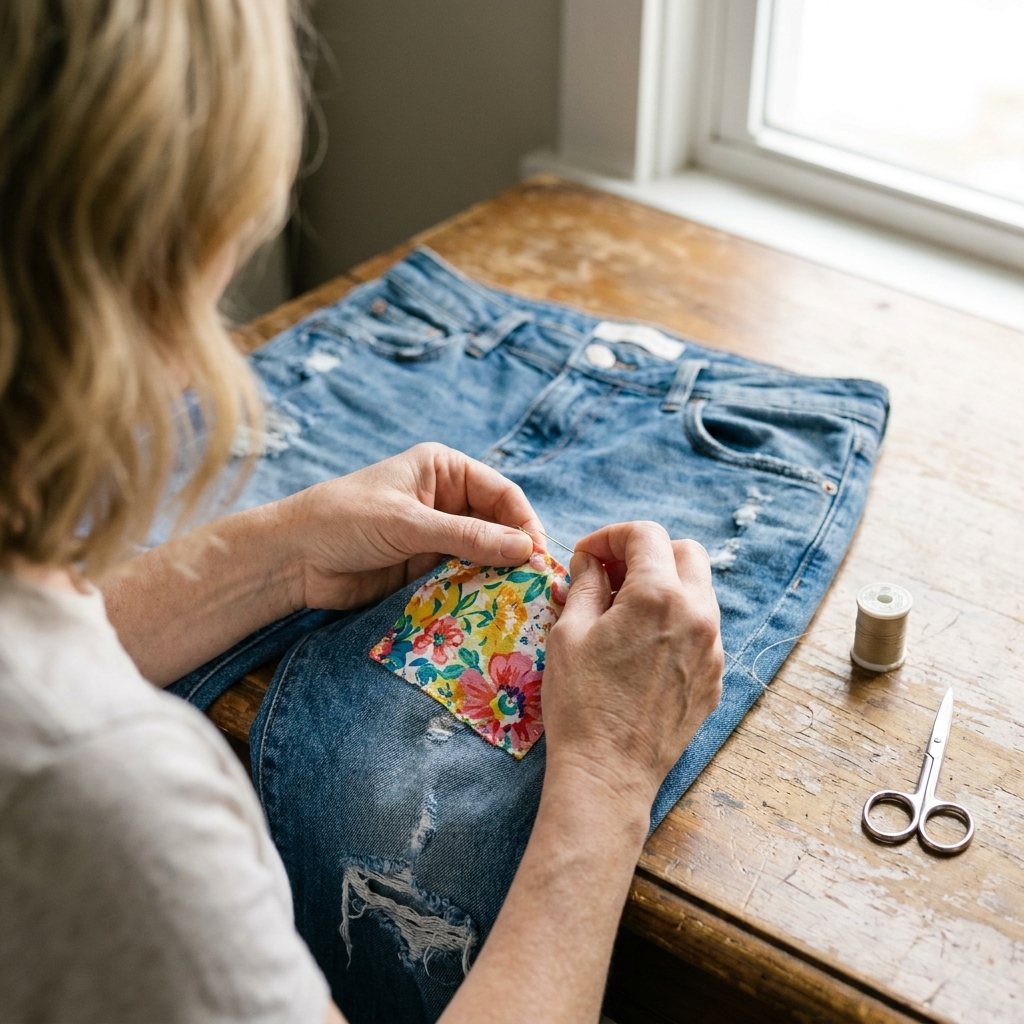
Visible mending is exactly what it sounds like. You fix the damage, but you do not hide the repair. You lean into it. The result can be genuinely cute, and more importantly, it keeps your favorites in rotation instead of in a landfill.
Why visible mending saves money
- It stretches your clothing budget: A small patch or a few cents of thread can keep you from buying a new pair that might cost $40 to $90 or more, depending on brand and quality.
- It protects the rest of the garment: Reinforcing thin areas early helps prevent the dramatic blowouts that force replacement.
- It reduces decision fatigue: Fewer “I need new jeans” emergency shopping trips.
- It builds a useful skill: The first repair is awkward. The fifth feels like magic.
If you are thinking, “But I am not crafty,” I get it. I learned the same way I learned zero-based budgeting: one tiny, slightly messy attempt at a time.
Your starter mending kit
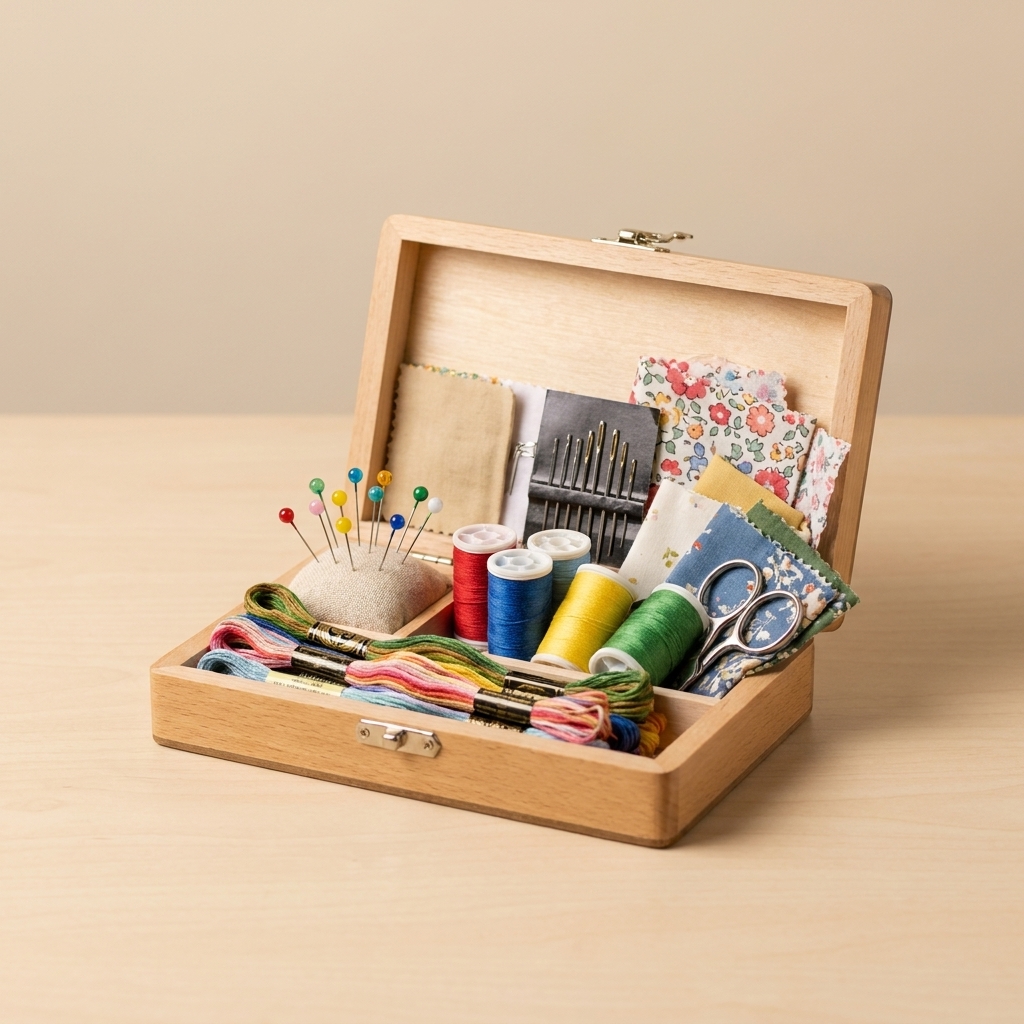
You do not need a $300 sewing machine to start. Here is the simple setup I recommend:
- Needles: A basic hand-sewing needle set. If you can, include a tapestry needle (blunt tip) for darning.
- Thread: All-purpose polyester thread for general repairs. For visible mending, grab a few colors you love.
- Embroidery floss (optional but fun): Great for bold, visible stitches and sashiko-style looks.
- Scissors: Small, sharp scissors make everything easier.
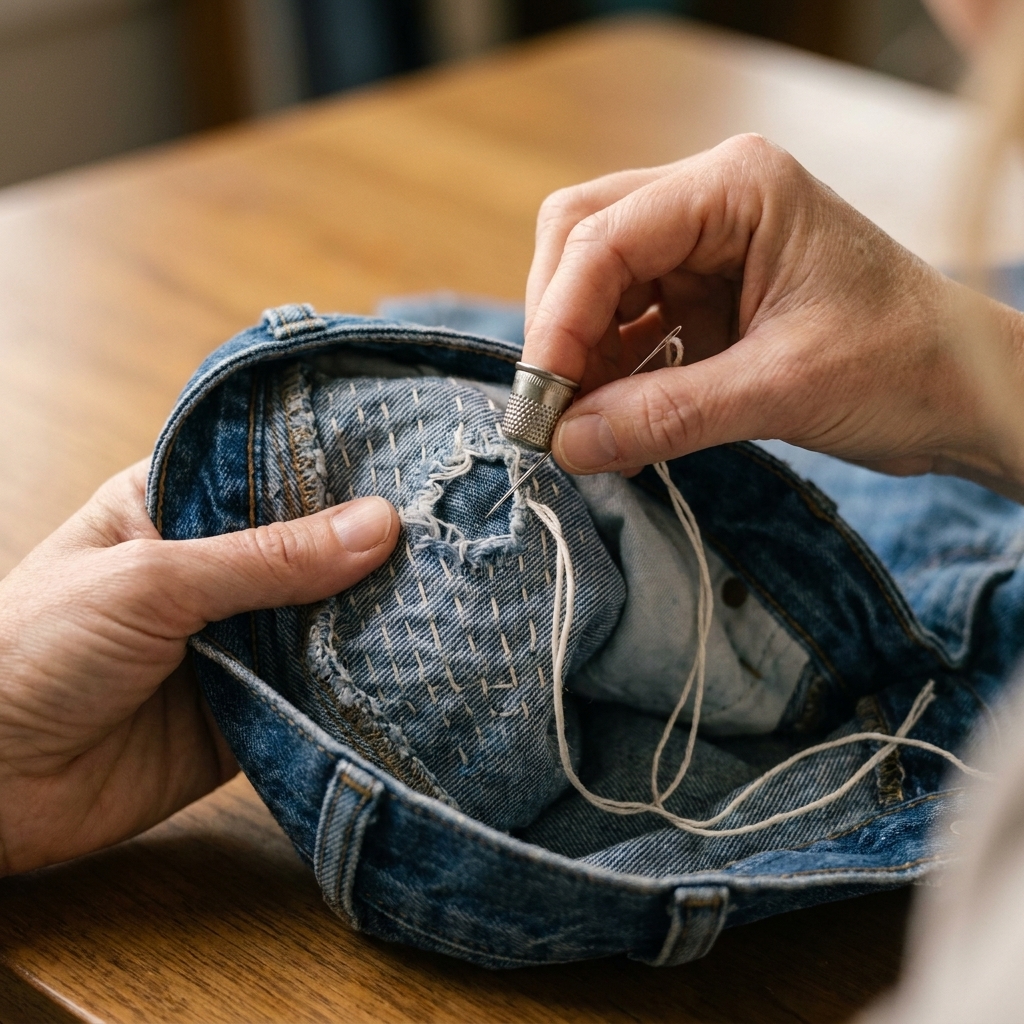
- Thimble (optional): Helps when pushing through denim or thick fabric.
- Fabric for patches: Old jeans, worn-out flannel, a scrap from a thrifted shirt, or a bandana.
- Something to darn on: A darning mushroom is nice, but a tennis ball, a wooden egg, or a tightly rolled sock works well. (Skip lightbulbs. They can break, and you do not need that drama.)
- Pins or clips: To hold patches in place.
- Iron-on fusible web (optional): Helps anchor a patch before sewing.
Quick prep tip: If you are using scrap fabric for a patch, pre-wash and dry it first. It helps prevent surprise shrinking or dye transfer later.
Pick the right fix
Use this quick decision guide:
- Patching: Best for holes, tears, and thin areas on sturdy fabrics like denim, canvas, work pants, and kids’ knees.
- Darning: Best for knitwear (socks, sweaters) and small holes where you want to rebuild fabric with thread.
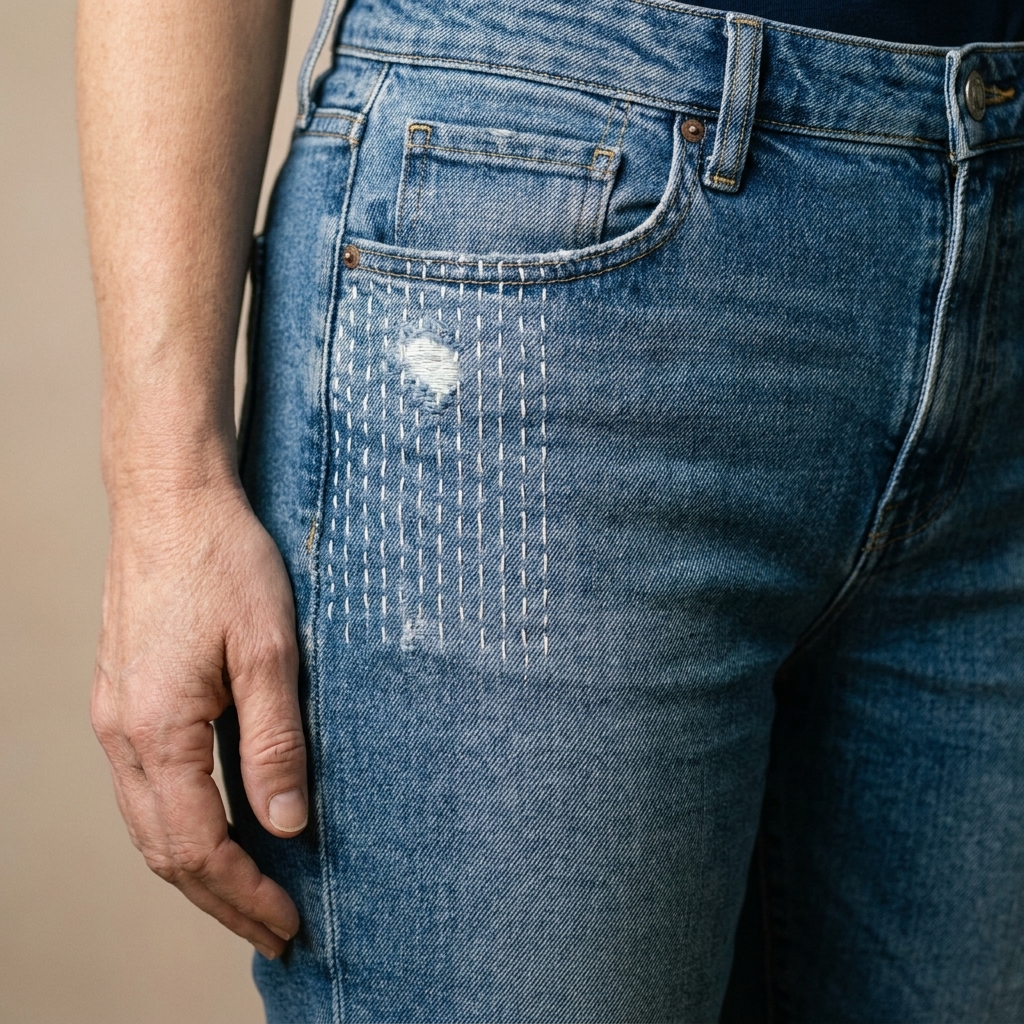
- Sashiko-style stitching: A running-stitch technique traditionally used to reinforce fabric. Great for strengthening thin spots, holding a patch down, and making a repair look intentional.
When to go pro: If you are dealing with a zipper replacement, a major seam blowout, or a structured, tailored piece you truly love, a local tailor or alteration shop can be worth the cost.
Easy patching
When patching works best
Patch when fabric is missing (a hole) or weakened (fraying, thinning, or about to tear). For jeans, I strongly recommend patching before the hole becomes huge.
What kind of patch should you use?
- Inside patch: Cleaner look from the outside, very durable. Ideal for jeans.
- Outside patch: Bold and decorative, easier to position. Great for visible mending vibes.
- Store-bought iron-on patch: Quick, but I still recommend stitching around the edges so it does not peel after a few washes.
Step-by-step: patch a hole
- Trim loose threads. Do not cut the hole bigger, just remove frayed bits.
- Cut your patch at least 1 inch larger than the damaged area on all sides.
- Place the patch. For an inside patch, turn the garment inside out and center the patch under the hole.
- Secure it with pins or clips. If you have fusible web, lightly fuse it in place first. Test heat on an inconspicuous area if you are unsure how the fabric will react.
- Thread your needle and knot the end.
- Stitch it down. Use a simple running stitch or whip stitch around the edge, then add a few rows across the center for strength.
- Finish securely. Make a few small stitches in place and knot on the inside.
Frugal tip: If your jeans keep wearing out in the same spot (hello, inner thighs), patch the thin area even if it has not torn yet. You are not being “extra.” You are being proactive.
Simple darning
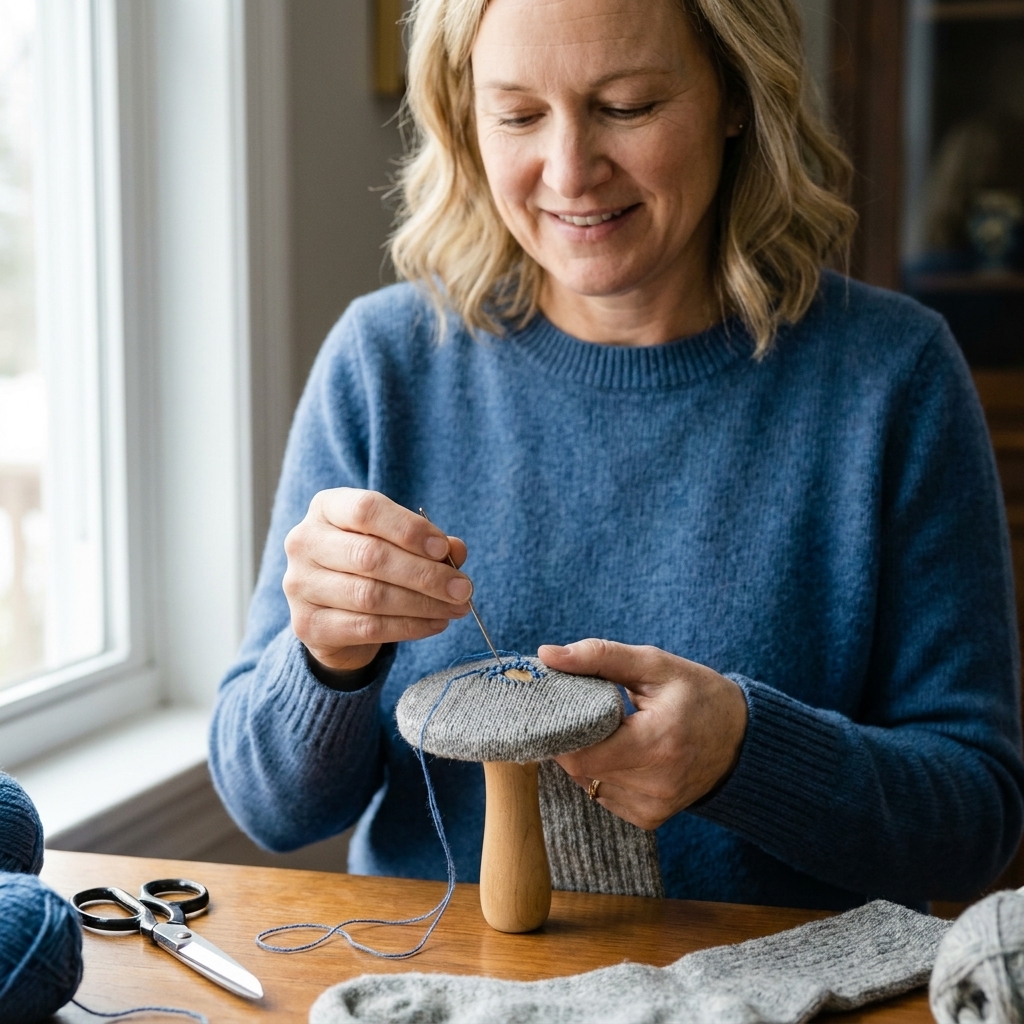
Darning looks intimidating until you realize it is basically weaving. You create a grid of threads, then weave through it to replace the missing fabric.
Best fabrics for darning
- Socks (especially thicker ones)
- Sweaters and knit beanies
- T-shirt holes can be darned, but a patch is often sturdier
Thread that works
For socks, regular sewing thread can work in a pinch, but it is often not as comfy or durable as sock yarn or darning yarn, which has a bit more thickness and give. For sweaters, try to match the fiber and weight when you can, but do not let “perfect” stop you from fixing the hole.
Step-by-step: darn a sock hole
- Put something under the hole to create tension. A darning mushroom is great, but a tennis ball or a tightly rolled sock works.
- Choose your thread. For socks, use sock yarn or strong darning yarn. For visible mending, pick a contrasting color you like.
- Stitch “warp” threads across the hole. Go back and forth, anchoring into solid fabric on each side.
- Weave “weft” threads over and under the warp threads, alternating each pass like a basket weave.
- Cover the weak area, not just the empty hole. Extend into healthy fabric so it does not rip again immediately.
- Secure and finish. Instead of a bulky knot, use a few tiny backstitches and weave the tail under nearby stitches, then trim.
Comfort note: When darning socks, keep the weave smooth and keep the ends tidy. Try the sock on before you trim everything down. Your foot will tell you the truth.
Basic sashiko stitches
Sashiko is a traditional Japanese technique built around simple running stitches. You can use it to:
- Hold patches down securely
- Reinforce thinning fabric
- Add structure to a repair so it lasts longer
An easy pattern to start
Try straight, evenly spaced running stitches in rows. That is it. You do not need perfect spacing to get the benefit.
Step-by-step: reinforce a thin spot
- Mark the area lightly (chalk or a washable marker). A simple rectangle works.
- Thread a needle with embroidery floss or thicker thread for a bolder look.
- Sew running stitches in parallel lines across the rectangle, keeping stitches roughly the same length.
- Turn and repeat if you want a grid effect.
- Secure the ends with small backstitches and a knot on the inside.
My favorite beginner move: Put a patch on the inside of jeans, then sashiko-stitch over the area on the outside. It is sturdy and looks like you meant to do it.
Make repairs that last
- Only stitching the edge of a patch: Add a few rows across the patch, especially on high-stress areas like thighs and knees.
- Not extending into strong fabric: Anchor stitches at least 1/2 inch into healthy fabric.
- Using weak thread on heavy fabric: Denim needs sturdy thread and smaller stitches.
- Skipping reinforcement on thin areas: This is where visible mending shines. Fix it early.
- Pulling stitches too tight: Especially on knits. Tight stitches can pucker and cause new stress points.
What it can save
Visible mending is not just a cute hobby. It is a real line item in your budget.
- Replacing jeans can easily run $40 to $100 or more. Patching them can be as little as a scrap of fabric plus a few cents of thread.
- Replacing a sweater because of a snag or hole might cost $30 to $80 depending on where you shop. Darning it can take as little as 20 to 30 minutes once you get the hang of it.
- Kids’ pants with torn knees are a constant expense. Knee patches can turn one season of wear into two or three.
If you mend even two items you would have replaced this year, there is a good chance your starter supplies pay for themselves.
Try this week
- Project 1: Patch the inside of your most-worn jeans before they blow out.
- Project 2: Darn one sock. Even if it is not perfect, you will learn the motion.
- Project 3: Add sashiko-style rows over a thinning elbow or cuff.
Pick one item from your “almost donate” pile and practice on that. The pressure disappears when it is already on the way out.
After-care
- Wash gently when you can. Cold water and turning garments inside out help repairs last.
- Avoid high heat on patched areas, especially if you used fusible web.
- Check and reinforce after a few wears. A quick restitch is easier than starting over.
FAQ
Is visible mending strong enough for daily wear?
Yes, especially when you reinforce beyond the hole and use sturdy stitches. For jeans, an inside patch plus stitching across the patch is my go-to durable combo.
Do I have to use special sashiko supplies?
No. Traditional sashiko thread and needles are lovely, but you can absolutely start with embroidery floss and a basic needle. The technique matters more than the tools.
What if my repair looks messy?
Welcome to the club. Your first repairs are supposed to look like first repairs. The goal is a wearable, sturdy fix. Pretty comes with practice, and “imperfect but functional” still saves you money.
When should I stop mending and replace the item?
If the fabric is worn thin in multiple places, the fit is uncomfortable, or the cost of repair materials is more than you would reasonably spend replacing it, it may be time. But most “one bad spot” items are absolutely worth saving.
A gentle challenge
The next time something rips, pause before you click “add to cart.” Grab a needle, choose a thread color that makes you smile, and give it one honest attempt. Visible mending is frugal in the best way. It helps you keep what you already own and reminds you that you are allowed to be a work in progress, financially and otherwise.